|
| Windshield Decal Installation Instructions |
|
|
| Windshield Decal Installation Instructions |
| The following are the application instructions recommended by Auto Trim DESIGN. These procedures must be followed prior to any consideration by Auto Trim DESIGN and/or it’s graphic manufacturers in regard to replacement or credit. Failure to follow instructions listed below in bold red letters may result in product failure and be considered non-warrantable. |
| Graphic Installation Instructions |
| Graphic Materials Information |
| Preparation & Cleaning Procedures |
| Installation Guidelines |
| Exterior Graphic Care |
| Graphic Materials Information | |
| Storage and Rotation: | |
| Stock rotation and climate-controlled storage are important. Age and temperature extremes degrade the adhesive and can dramatically reduce its effectiveness. Product should be used within the recommended storage life of two years. In addition, product should be stored in an environment between 60 and 90 degrees Fahrenheit. | |
| Temperature Recommendations: | |
| Surface temperature should be between 50 and 90 degrees Fahrenheit before attempting the installation. As a general rule, if the surface is hot to the touch it's over 90 degrees Fahrenheit. Adhesive becomes brittle when it gets too cold and gummy when it gets too hot. Applications outside the recommended range of 50 to 90 degrees Fahrenheit reduce the adhesives' ability to perform. | |
| Preparation & Cleaning Procedures | |
| Cleaning
Procedures: |
|
All
surfaces are contaminated to some degree. To ensure good adhesion to any
vehicle surface, it is critical that you follow these recommended
procedures in decontaminating and preparing the surface prior to any
vinyl product installation. A clean,
lint free towel or cloth must be
used between each of the cleaning steps to prevent cross-contamination.
|
|
|
A note about Windshield Cleanliness |
|
|
The prior use of synthetic protectants and silicones (i.e. Armorall, Son of a Gun, Rainex, etc.) on the substrate can result in adhesive difficulties. Therefore, special substrate cleaning with a silicone removal agent (i.e. 3M #08984 General Purpose Adhesive Cleaner, Denatured Alcohol, etc.) may be required, perhaps repeatedly. A final cleaning with DENATURED ALCOHOL is recommended with thorough drying of surface. Clean surface until all slick feel on the substrate is gone. Always test any cleaner on an inconspicuous area first for any reactions to surface finishes. |
|
| Installation Guidelines | |
| Application Procedures: | |
|
|
|
Illustrated Installation Procedures |
|
|
|
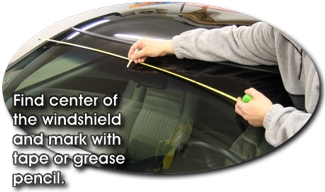
Step
1 After thoroughly cleaning the windshield surface, find and mark it's center with a small piece of tape or white grease pencil. Take care not to use the Rear View Mirror mount for reference as not all mirrors are placed at exact windshield center. |
|
|
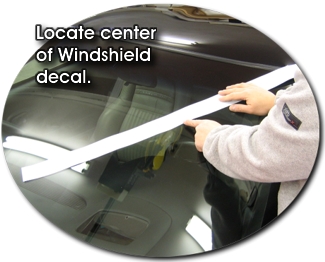
Step
2 Locate and mark center of the Windshield Decal. Center can easily be found by folding the decal lengthwise in two . The resulting crease is center. |
|
|
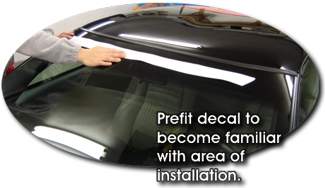
Step
3 Once centers are found, place decal onto windshield so as to become familiar with desired placement. |
|
|
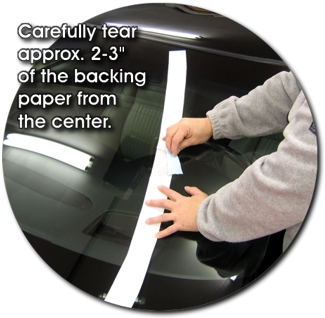
Step
4 Recommended method of installation is the Center Hinge. This is achieved by carefully removing a 2-3" portion of the backing paper from the center as shown. |
|
|
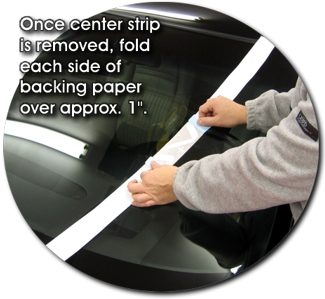
Step
5 Once a portion of the center is removed, simply fold back each side of the backing paper approximately 1" (25.4mm) onto itself. |
|
|
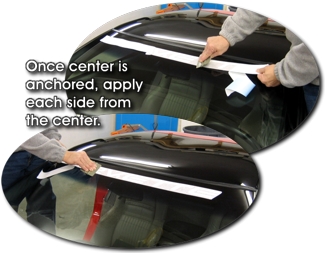
Step
6 Then, turn the decal over and carefully set it in the desired location, making sure it's centered. When placed correctly, stick the center exposed area down with your thumb. |
|
|
Step
7 Once "hinged", apply each side of the decal from the center with an application squeegee or soft non-marring tool. |
|
|
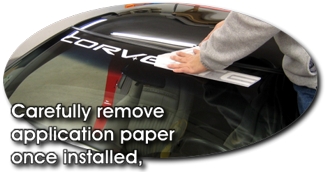
Step
8 To remove the application tape, peel SLOWLY at a sharp (180°) angle. If the vinyl appears to be lifting, gently push the application tape in the opposite direction from which you were pulling and re-squeegee that area. If after removing the application tape, air bubbles are apparent, puncture the vinyl with a pin or needle (DO NOT USE a knife or razor blade) and squeegee out the air towards the puncture. |
|
|
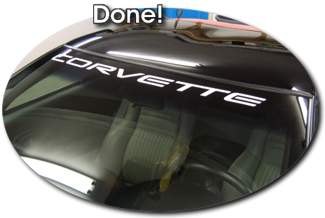
Step
9 Step back and ADMIRE! |
Exterior Graphic Care |
|
Today's finest pressure-sensitive vinyl materials have been used to create your new graphics. These graphics require little maintenance and should be treated similarly to a painted surface.
|
| Note about Windshield Lettering Products: There is no warranty on windshield lettering products against peeling, wiper blade damage, ice scraper damage, or any other type of damage that may occur. While these occurrences all prove to be out of our control, rest assured that the vinyl materials used are Premium grade with a life expectancy in regard to colorfastness of 5-7 years. |
|
As always, if you have any questions feel free to e-mail us. We're here to serve. Thanks! |
| Need to contact us? Simply email us at technical@autotrimdesign.com. |
| Copyright © 2006 [Auto Trim DESIGN]. All rights reserved. |